
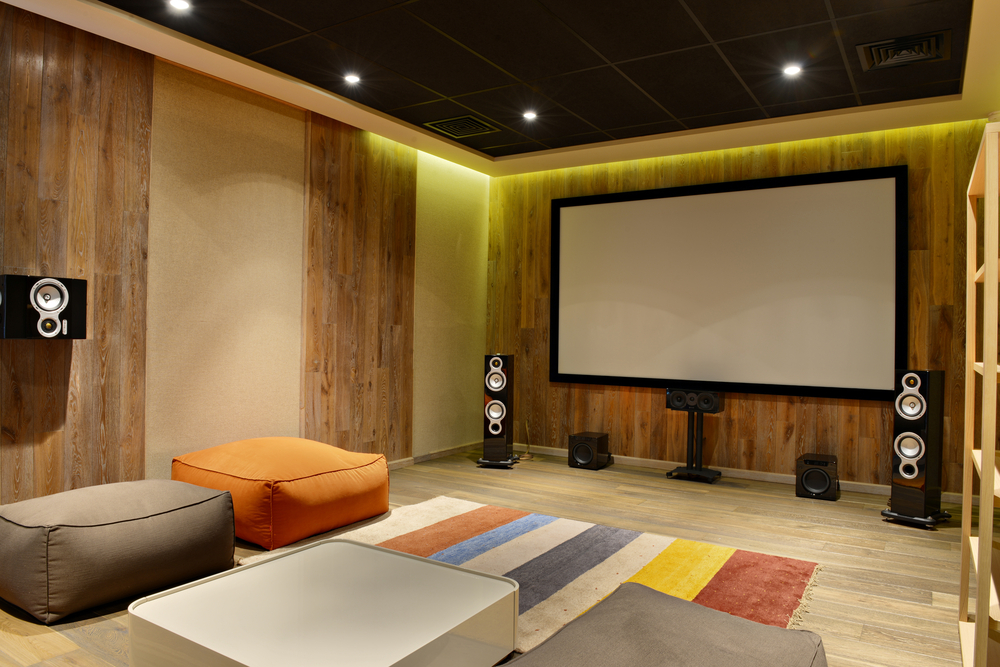
Home Theater Setup: A Complete Guide to Building Your Ideal Movie Room
A great home theater setup is about more than buying a big TV and some speakers. The room, the layout, the wiring, and the acoustics all work together to create a cinematic experience. Whether you're converting a basement, a spare bedroom, or a corner of your living room, this guide covers everything you need to plan it right.
Table of Contents
- Choosing the Right Room and Layout
- Screen and Seating Distance
- Sound and Speaker Placement
- Acoustics and Room Treatment
- Light Control
- Electrical, Wiring, and Power
- Equipment: Display and Audio
- Budget Breakdown
- Setup Order: Where to Start
- Additional Considerations
- FAQs
Things You Need For Complete Home Theater Setup
Choosing the Right Room and Layout
The room you pick sets the foundation for everything else. Basements tend to work best because they have fewer windows, naturally lower ambient noise, and more flexibility for acoustic treatment. Any dedicated room with minimal foot traffic and controlled access can also work well.
Room shape matters for sound quality. Rectangular rooms are preferred over square rooms because they reduce standing waves, which cause uneven bass response.
- Place the screen on a wall that receives no direct sunlight
- Plan for a riser of 8 to 12 inches if adding a second seating row
- Keep a clear line of sight from every seat to the bottom of the screen
Check how we design your home theater set up according to your space: Home theater installation for any space
Screen and Seating Distance
Getting the screen-to-seat distance right is one of the most critical decisions in a home theater setup. A widely used guideline places the main seating row at 1.5 to 2.5 times the diagonal screen width. Screen height should sit at eye level when seated — mounting it too high causes neck strain over long viewing sessions.
|
Screen Size |
Comfortable Seating Distance |
|
80 inches |
~8.9 feet |
|
100 inches |
~11.2 feet |
|
120 inches |
~13.4 feet |
Place the bottom edge of the screen about 30 to 36 inches from the floor. This keeps it visible when seats are reclined and reduces neck strain.
Sound and Speaker Placement
Speaker placement follows clear principles, and getting it right costs nothing extra — just planning before you run cables.
- Center channel: Directly above or below the screen, aligned with the listening position — handles most dialogue
- Front left and right: At 22 to 30 degree angles from the main seat
- Surround speakers: Slightly behind or to the sides of the seating area
- Subwoofer: Near a corner or the front wall for the strongest bass response
- Atmos speakers (if applicable): Ceiling-mounted for height effects
For most rooms, a 5.1 system covers all the bases. Larger dedicated rooms benefit from a 7.1 or 7.1.4 Dolby Atmos configuration. The AV receiver ties all the sources, speakers, and the display together.
Acoustics and Room Treatment
Hard surfaces reflect sound in ways that create echo and muddy bass. Treating the room fixes this without requiring construction.
- Carpet or area rugs on hard floors
- Thick curtains on windows and along bare walls
- Acoustic panels on side walls and behind the primary seats
- Bass traps in room corners to control low-frequency buildup
- Diffusers on the rear wall to scatter reflected sound
If you're using a projector, an acoustically transparent screen lets you place the center and front speakers behind the image for better dialogue localization.
Light Control
Light control is one of the most impactful upgrades for picture quality, especially with a projector. Even a small amount of ambient light washes out contrast and makes colors look flat.
- Use blackout curtains or motorized shades on all windows
- Paint walls and ceilings with dark, matte finishes (deep gray or navy)
- Install dimmable or app-controlled lighting
- Avoid any light source directly in front of the screen
For in-depth information on all aspects of a home theater setup, head to our detailed guide now: Preparing your room for a home theater
Electrical, Wiring, and Power
High-draw equipment, particularly large amplifiers, benefits from a dedicated circuit so it is not sharing power with appliances that cause voltage fluctuations. Layered surge protection — a whole-home unit at the panel plus point-of-use protection at the equipment rack — is the right approach for expensive electronics.
- Dedicated circuit for the AV equipment
- HDMI 2.1 cable runs for current and future sources
- In-wall or under-floor cable routing for a clean install
- Labels on every cable for future serviceability
- Ventilation in equipment cabinets — AV gear generates real heat
- Network drops for streaming and control systems
Running spare conduit during the build costs almost nothing. Adding cable runs after walls are finished is expensive and disruptive.
Equipment: Display and Audio
The display and audio system need to be balanced with each other. A great projector paired with a weak speaker system will always feel disappointing, and the reverse is equally true.
Display options:
- Large OLED TVs — best contrast and color accuracy; work well with some ambient light
- 4K projector with screen — more cinematic; best in fully controlled light; better value above 100 inches
- LED or QLED TVs — solid 4K performance across a wide price range; good in brighter rooms
|
Audio Configuration |
Description |
Best For |
|
5.1 |
5 speakers + 1 subwoofer |
Most rooms and smaller theaters |
|
7.1 |
7 speakers + 1 subwoofer |
Larger rooms; more surround coverage |
|
5.1.2 / 7.1.4 |
Dolby Atmos with overhead channels |
Dedicated theaters with ceiling access |
A useful rule: budget roughly similar amounts for audio and video. The best home theater setups stay balanced rather than overspending on a screen while underinvesting in sound.
Budget Breakdown
|
Setup Type |
Typical Cost Range |
What It Includes |
|
Basic media room |
$1,000 – $7,000 |
Large TV, soundbar or basic speakers, minimal treatment |
|
DIY component theater |
$3,000 – $15,000 |
Separate display, receiver, speakers, subwoofer, wiring |
|
Mid-range dedicated theater |
$13,000 – $32,000 |
Projector, screen, quality speakers, acoustic treatment |
|
High-end custom theater |
$20,000 – $100,000+ |
Full construction, acoustics, luxury seating, automation, labor |
Cost breakdown by component:
- Display: $450 – $3,000+ for a TV; $2,000 – $6,000+ for a projector and screen
- Audio (receiver, speakers, subwoofer): $750 – $5,000+ for a proper surround system
- Seating: basic couches to $10,000+ for dedicated theater recliners
- Acoustic treatment: $300 – $8,000 depending on room size and coverage
- Electrical and wiring: $700 – $2,000 for dedicated circuits and in-wall runs
- Professional labor: $0 for full DIY; $1,000 – $10,000+ for professional integration
Setup Order: Where to Start
- Measure the room and decide between a TV or projector
- Choose seating distance and confirm screen size fits the space
- Plan speaker layout and subwoofer placement
- Decide on lighting control and window treatments
- Plan and install power protection, wiring, and cooling
- Install acoustic treatment
- Calibrate audio and video after all placement is finalized
Calibrating last matters more than people expect. Even great equipment placed correctly will underperform if the receiver is left at factory defaults. Room correction software in most modern receivers makes a real difference.
Additional Considerations
- Internet and networking: Streaming, smart control, and firmware updates all need reliable connectivity in the room
- Remote control or automation: A unified control system for lights, shades, and AV switching makes the room far more practical
- Equipment ventilation: Enclosed AV racks need airflow — heat shortens equipment life significantly
- Future expansion: Run spare HDMI, speaker wire, and conduit now — it costs little during construction and a lot afterward
- Permits: Electrical and structural work may require local permits; check requirements before starting
Need help with installation? We provide professional and affordable home theater installation services, contact us today to know how we can make the entire set-up process easy and hassle-free for you!
FAQs
What is the ideal room for a home theater setup?
A basement works best because it has minimal windows, natural sound isolation, and good temperature stability. Any rectangular room with controlled light and sound access can also work. Avoid square rooms when possible, as they create uneven bass from standing waves.
How far should you sit from the screen?
The standard guideline places seating at 1.5 to 2.5 times the diagonal screen width. For an 80-inch screen, that is roughly 9 feet. For a 120-inch screen, about 13 feet.
Is a projector or a TV better for a home theater?
For screens approaching 100 inches or larger, a projector and screen is usually more cost-effective than a TV of that size. TVs perform better in rooms with some ambient light. Projectors deliver a more cinematic feel but require near-total light control.
What surround sound system is best for a home theater?
A 5.1 system works well for most rooms. A 7.1 setup adds two additional surround speakers for more coverage in larger spaces. Dolby Atmos configurations like 5.1.2 or 7.1.4 add overhead channels and deliver the most immersive audio in a dedicated room with ceiling access.
How much does a home theater setup cost?
A basic media room runs $1,000 to $7,000. A DIY component theater typically costs $3,000 to $15,000. A professionally installed mid-range theater falls between $13,000 and $32,000. Full custom builds with construction and luxury finishes can exceed $100,000.
Do I need acoustic treatment?
Yes, in most cases. Bare walls, hard floors, and glass reflect sound and degrade audio quality noticeably. Starting with a large rug, thick curtains, and a few acoustic panels makes a real difference without major cost.
Do I need a dedicated electrical circuit?
For a basic setup, a standard circuit is usually fine. For larger systems with high-powered amplifiers, a dedicated circuit prevents voltage issues caused by sharing power with appliances. Surge protection at both the panel and the equipment rack is important.
Should I hire a professional installer or do it myself?
Simple setups are straightforward to handle yourself. For in-wall wiring, ceiling speakers, projector mounting, or a full room build, professional installation ensures the system is safe and properly calibrated. DIY can save $1,000 to $10,000 in labor, but complex installs carry real risk of poor performance or damage.
What color should you paint a home theater room?
Dark, matte finishes work best. Deep gray and navy absorb ambient light rather than reflecting it. Avoid gloss paints and light colors, especially in rooms using a projector.
What is commonly overlooked when planning a home theater?
Ventilation for equipment racks, network connectivity, automation planning, and future wiring capacity are the most commonly missed items. Running spare conduit and extra cable runs during construction costs very little but saves significant expense later.
Final Words
A well-planned home theater setup requires careful attention to the room, the display, the audio, the wiring, and the acoustics. Skipping steps early almost always means fixing them later at greater cost.
RMS Installs designs and installs custom home theater systems tailored to your space, preferences, and entertainment goals. From layout and equipment selection to installation and tuning, we create immersive viewing experiences. Call (470) 456-3108 to learn more.
Certified partners






Click Here to Fill The Form Online or Call us at:

Business Hours
| Monday | 08:00 AM - 06:00 PM |
| Tuesday | 08:00 AM - 06:00 PM |
| Wednesday | 08:00 AM - 06:00 PM |
| Thursday | 08:00 AM - 06:00 PM |
| Friday | 08:00 AM - 06:00 PM |
| Saturday | 10:00 AM - 05:00 PM |
| Sunday | (Closed) |