
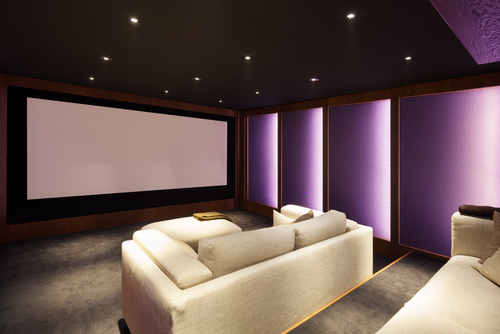
Things To Consider Before Home Theater Installation
Table of Contents
- Introduction
- Choosing the Right Room
- Budget Planning
- Speaker Placement and Surround Sound
- Acoustics and Soundproofing
- Screen, Projector, and Display Options
- Electrical Requirements and Safety
- Lighting and Ambiance Control
- Smart Home Integration
- Professional vs. DIY Installation
- Permits and Insurance
- Common Mistakes to Avoid
- Additional Considerations
- FAQs
- Final Words
Introduction
A proper home theater installation brings the cinema experience into your home. You get a large screen, powerful sound, and full immersion without expensive tickets or noisy crowds. But getting there takes real planning. Room selection, acoustics, wiring, and equipment all affect the final result. This guide covers every key factor so your setup performs well from day one.
Choosing the Right Room
A dedicated basement room is ideal because it naturally limits outside noise and ambient light. If you are working with a multi-purpose space, a rectangular room is better than a square one since it creates fewer acoustic problems.
Aim for roughly 15x20 feet for single-row seating, with ceilings at least 8 to 9 feet tall to support Dolby Atmos height channels. Limit windows to reduce glare and outside noise. Before moving any furniture, mark seating positions on the floor to confirm that viewing distances fall within 1.5 to 2.5 times the screen's diagonal measurement. Avoid rooms next to kitchens or high-traffic areas since noise bleed affects both audio and concentration.
Budget Planning
Costs vary widely depending on what you are building.
|
Setup Level |
Estimated Cost |
What's Included |
|
Basic |
$2,000 to $3,000 |
Entry-level AV receiver, TV, basic speakers |
|
Mid-range |
$5,000 to $15,000 |
Quality display, 5.1 or 7.1 surround, acoustic treatment |
|
Custom / High-end |
$20,000 to $60,000+ |
Dolby Atmos, projector, smart integration, full room build |
|
Professional labor |
$100 to $250 per sq ft |
Wiring, mounting, calibration included |
Set aside an extra 10 to 20 percent for acoustic panels, smart home additions, or future upgrades like fiber-optic HDMI conduits.
Speaker Placement and Surround Sound
The center speaker handles roughly 80 percent of dialogue. It should sit directly above or below the screen at ear level, around 3 to 4 feet from the floor.
Surround sound configurations:
- 5.1 – Standard, works well for most mid-size rooms
- 7.1 – Adds rear channels for larger spaces
- Dolby Atmos – Adds ceiling or upward-firing height channels for a three-dimensional sound field
Place front speakers at ear level when seated. Surround speakers should sit slightly above ear level. Do not mount them at ceiling height or below shoulder level, and avoid placing them directly beside seating positions against side walls.
Acoustics and Soundproofing
Bare walls and hard floors cause echoes and muddy bass that no equipment upgrade can fix.
- Use Rockwool insulation and double drywall to prevent sound from leaking into other rooms
- Install acoustic panels on side and rear walls to reduce reflections
- Add bass traps in corners for rooms under 60 square meters
- Seal gaps around doors with acoustic door sweeps
Electronics generate heat in enclosed spaces. Make sure the room has a dedicated HVAC return or additional cooling to prevent components from overheating.
Use Oxygen-Free Copper (OFC) cables for audio connections. Run conduits during installation so cabling can be upgraded later without cutting into walls.
Screen, Projector, and Display Options

|
Display Type |
Best For |
Key Consideration |
|
4K UHD TV |
Rooms with ambient light, smaller spaces |
Better brightness, simpler setup |
|
Projector + screen |
Large rooms with controlled lighting |
Cinematic scale, requires a darker room |
Sit between 1.5 and 2.5 times the screen's diagonal distance from the display. Too close and you will see pixel structure. Too far and the sense of immersion drops off.
Electrical Requirements and Safety
AV receivers, projectors, amplifiers, and subwoofers all draw significant power. Assess your panel before purchasing equipment.
- Install dedicated circuits for high-draw components to prevent tripped breakers
- Use surge-protected outlets on all AV gear
- Add Ethernet drops and USB stations during rough-in
- Run concealed wiring through protective conduit tubing
- Always use a licensed electrician for new circuits or panel work
Lighting and Ambiance Control
- Install dimmer switches on all room fixtures
- Place indirect LED bias lighting behind or beside the screen to reduce eye strain
- Use blackout curtains or motorized shades to eliminate glare and reflection
- Connect lighting to a smart control system so levels adjust automatically when playback starts
Smart Home Integration
Wiring for smart control during installation is far easier than retrofitting it afterward. Systems like Control4 let you manage lighting, audio, video, and temperature from one interface or voice command.
A wired Ethernet connection to your AV receiver is always more reliable than Wi-Fi for 4K HDR streaming.
Professional vs. DIY Installation
|
Factor |
Professional |
DIY |
|
Complex wiring |
Done correctly upfront |
Risk of errors |
|
System calibration |
Measured and optimized |
Often guesswork |
|
Warranties |
Typically preserved |
May be voided |
|
Cost |
Higher upfront |
Lower upfront, higher risk |
|
Best for |
Full builds, Dolby Atmos, smart integration |
Basic TV and speaker setups |
If you hire an expert home theater installation services provider, verify that they carry general liability insurance. For any build involving in-wall wiring or structural changes, professional installation is the more reliable long-term choice.
Permits and Insurance
Permits are required in most areas whenever new wiring or structural changes are involved. Requirements vary by city and state. Skipping permits can result in fines and may affect a future home sale.
Unpermitted work can also lead insurers to deny claims if damage occurs in that space. Check with your local building authority before starting any work beyond basic mounting and connections. Consider adding a rider to your homeowner's policy to cover the value of installed AV equipment.
Common Mistakes to Avoid
- TV mounted too high – The screen center should sit at eye level when seated, around 30 inches from the floor for a standard sofa
- Surround speakers at wrong height – Just above ear level, not at ceiling height or below shoulder level
- No acoustic treatment – Bare rooms make even premium speakers sound poor
- Wrong seating distance – Too close causes pixelation; too far reduces immersion
- No ventilation plan – Electronics in a sealed room without airflow overheat and fail
- Low-quality cabling – Cheap cables introduce signal loss, especially over longer runs
Additional Considerations

Seating and layout
For multi-row setups, use risers to elevate the rear row so sightlines clear front-row viewers. Dedicated theater seating with cupholders and storage improves the experience during long sessions.
Cable management
Secure floor-level cables in raceways or run them through walls to prevent tripping hazards. Set volume limits on receivers if children use the room regularly.
Future-proofing
Run extra conduit through walls during the initial build even if you do not need it today. HDMI standards and speaker formats continue to change, and accessible pathways make future upgrades far less disruptive.
For more information, read our complete guide on setting up a home theater step by step.
FAQs
What room size works best for a home theater?
Around 15x20 feet for single-row seating, with ceilings at least 8 to 9 feet tall. Rectangular rooms handle acoustics better than square ones.
How much does home theater installation cost?
Basic setups run $2,000 to $3,000. Mid-range systems cost $5,000 to $15,000. Custom full-room builds can reach $60,000 or more, with professional labor typically $100 to $250 per square foot.
Do I need a permit?
Any work involving new electrical circuits or structural changes usually requires one. Unpermitted work risks fines and insurance issues. Confirm requirements with your local building authority first.
Should I hire a professional or do it myself?
Basic setups are manageable as DIY. Complex builds involving in-wall wiring, Dolby Atmos, or smart integration are better handled by a professional to avoid errors and protect warranties.
Where does the center speaker go?
Directly above or below the screen at ear level when seated, around 3 to 4 feet from the floor.
What cables should I use for audio?
Oxygen-Free Copper (OFC) cables for speaker connections. Use certified 4K HDMI cables for video. Run conduit so future cable upgrades are possible without opening walls.
How do I reduce sound leakage?
Rockwool insulation and double drywall layers reduce transmission. Add acoustic panels inside the room and seal door gaps with acoustic sweeps.
Projector or TV, what’s best for my home theater?
TVs work better in rooms with ambient light. Projectors deliver a larger image but need a darker room and more planning. Choose based on your room's lighting conditions.
Final Words
A well-planned home theater installation delivers years of reliable performance when every detail is handled correctly, from room selection and acoustics to wiring and display choices. Taking time to plan upfront prevents costly fixes later.
RMS Installs supports homeowners at every step of creating the perfect home theater experience. Whether you are building a new setup or improving what you already have, our team is ready to assist. Call (470) 456-3108 to begin your project today.
Certified partners






Click Here to Fill The Form Online or Call us at:

Business Hours
| Monday | 08:00 AM - 06:00 PM |
| Tuesday | 08:00 AM - 06:00 PM |
| Wednesday | 08:00 AM - 06:00 PM |
| Thursday | 08:00 AM - 06:00 PM |
| Friday | 08:00 AM - 06:00 PM |
| Saturday | 10:00 AM - 05:00 PM |
| Sunday | (Closed) |